|
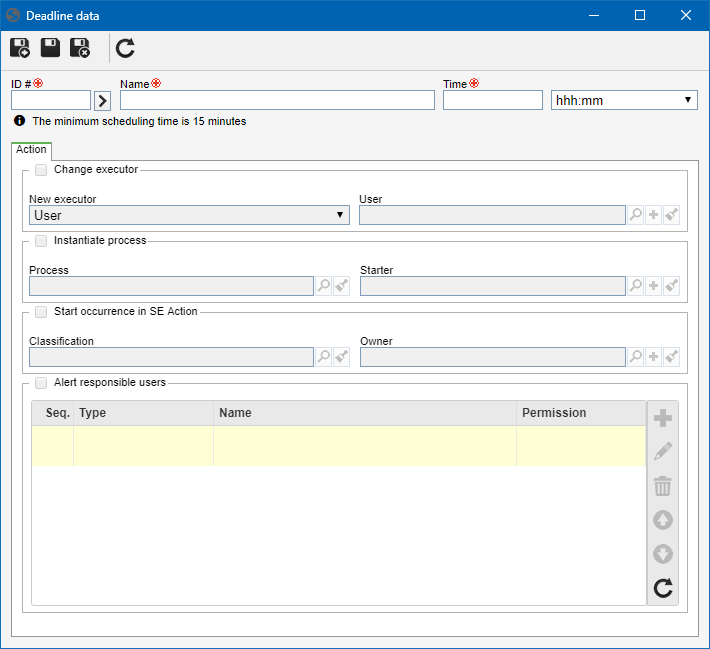
See how to create a new deadline:
1.
|
Click on the  button in this section and fill out the following fields on the data screen that will open up: button in this section and fill out the following fields on the data screen that will open up:

ID #: Enter a number/code to the deadline.
Name: Enter a name to the deadline.
Time: Set a time for the deadline, that is, the period after starting the activity. For example: Deadline actions will be sent 30 minutes after the activity starts. Note: It will not be possible to select a time smaller than 15 minutes for the deadline.
|
2.
|
Save the record after filling out the fields above. At this point, the other fields on this screen will be enabled to be filled out.
|
3.
|
On the Action tab, configure the action that will be triggered by the deadline in question. To do that, fill out the following fields:
Change executor
|
By checking this field, it will indicate that, upon reaching the deadline, the executor of the activity can be changed. Select in the New executor field who will perform the activity: user, functional role, starter/requester, starter leader or executor leader.
|
Instantiate process
|
If this field is checked, a process will be started when the deadline is reached. Then, select the process and the user that will start it.
|
Start occurrence in SE Action
|
If this field is checked, an occurrence from SE Action will be started when the deadline is reached. To do that, in the Classification field, select the occurrence classification and in the Owner define who will be the starter of this occurrence.
|
Alert responsible users
|
If this field is checked, upon reaching the deadline, a notification will be sent to certain responsible users.
Then, click on the  button to associate users that will be notified. This notification corresponds to a “Past due deadline” e-mail that shows information on the activity in which the deadline was associated. button to associate users that will be notified. This notification corresponds to a “Past due deadline” e-mail that shows information on the activity in which the deadline was associated.
|
|
4.
|
Save the record after configuring the deadline. At this point, when the deadline is reached, the actions configured above will be triggered.
|
|


