|
During the execution step, by opening the inventory data screen, the Execution section will be displayed by default, allowing the execution of the assets inventory of the activity. On the upper part, there is a progress bar that displays the assets inventory execution percentage. It is also possible to filter the listing through the following filters:
▪All: It displays all assets of the inventory activity in question. ▪To do: It displays only the assets that have yet to be found in the location. ▪Done: It displays the assets that were found in the location and that have not been edited. ▪Done changed: It displays the assets that were found and that have gone through a change. ▪Done exceeding: It displays the assets that were found in the location and that were not planned in the inventory. ▪Done not found: It displays the assets that were not found in the location. ▪Rejected: It displays the assets that were rejected during the Inventory execution approval step. That is, if the inventory activity, configured with execution approval, has its execution rejected, it will return to the execution step and this filter will allow viewing the rejected assets.
See the operations available for inventory execution:
In order to execute the inventory of an asset that has not been edited in its location, condition or responsible user, simply select it in the inventory data screen listing and click on the  button. At this point, the execution percentage will be updated and the asset will go from the "To do" inventory list to the "Done" inventory list. button. At this point, the execution percentage will be updated and the asset will go from the "To do" inventory list to the "Done" inventory list.
It is important to point out that this operation allows for more than one asset to be selected in the listing, that is, it will be possible to execute the inventory of more than one asset at a time, as long as there are no changes in the asset information.
|
|
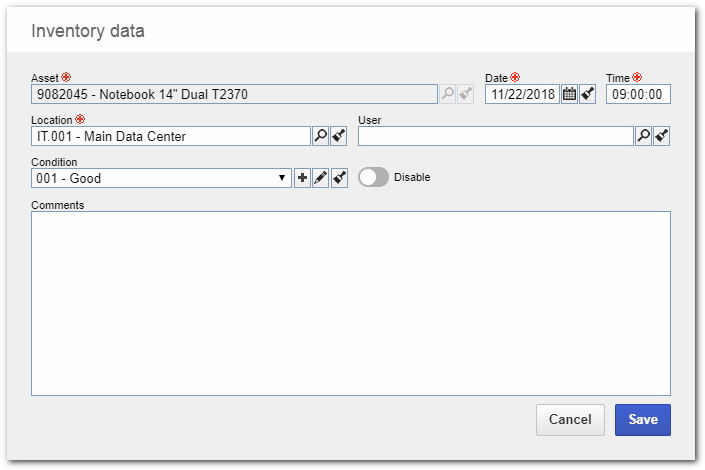
If during the inventory activity execution an asset that has had its location, condition or responsible user edited is found, it will be necessary to click on the  button for the information data screen to be displayed, allowing changed in the following information: button for the information data screen to be displayed, allowing changed in the following information:

Date: Enter the date in which the asset inventory execution was performed.
Time: Enter the time in which the asset inventory execution was performed.
Location: Enter the location in which the asset was found. By default, this field will be filled out with the location that had been defined for the asset. It is worth remembering that in this field only the locations planned for the inventory in question will be presented.
User: Enter the user that is responsible for the asset.
Condition: Enter the asset condition.
Disable: Check this option if the asset found is not in good conditions of use or is no longer able to be used. If this option is checked, it will be mandatory to fill out the comments.
Comments: Use this field to enter more details about the asset.
Click on the Save button to finish editing the asset information in the inventory. At this point, the execution percentage will be updated and the asset will go from the "To do" asset list to the "Done" asset list.
|
|
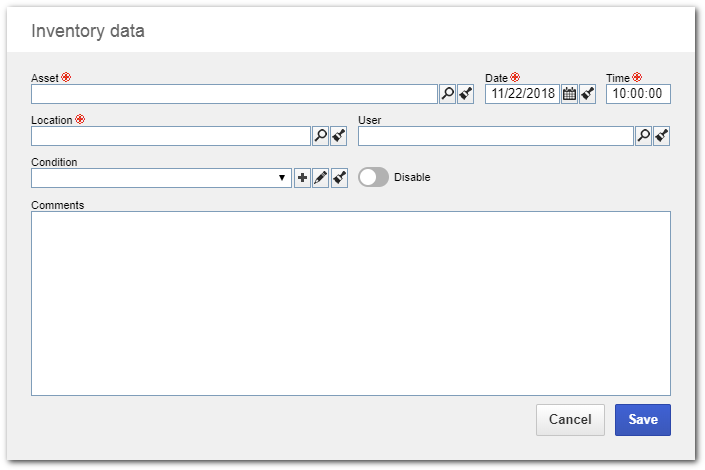
If during the inventory activity execution an asset that is not on the "To do" asset listing is found, it will be possible to add it to the listing. To do that, click on the  button and fill in the following information on the asset: button and fill in the following information on the asset:

Asset: Select the asset that was found during inventory execution.
Date: Enter the date in which the asset inventory execution was performed.
Time: Enter the time in which the asset inventory execution was performed.
Location: Enter the location in which the asset was found. By default, this field will be filled out with the location that had been defined for the asset. It is worth remembering that in this field only the locations planned for the inventory in question will be presented.
User: Enter the user that is responsible for the asset.
Condition: Enter the asset condition.
Disable: Check this option if the asset found is not in good conditions of use or is no longer able to be used. If this option is checked, it will be mandatory to fill out the comments.
Comments: Use this field to enter more details about the asset.
Click on the Save button to finish adding the asset to the inventory. At this point, the execution percentage will be updated and the asset will go to the "Done exceeding" asset list.
|
|
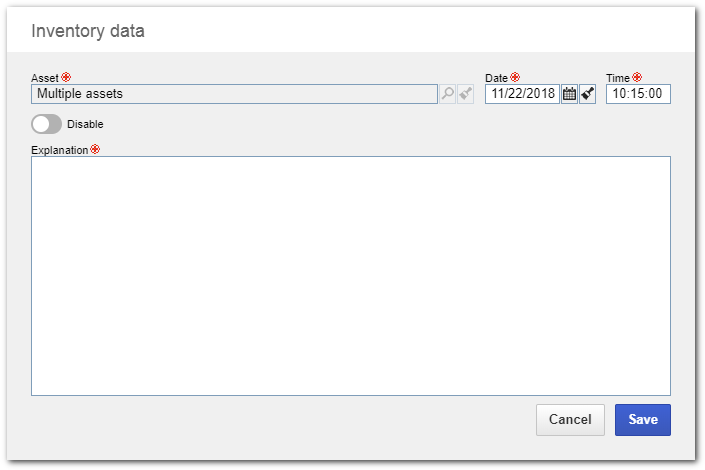
If during the inventory activity execution an asset that was on the "To do" list is not found, click on the  button and fill out the following fields: button and fill out the following fields:

Date: Enter the date in which the asset inventory execution was performed.
Time: Enter the time in which the asset inventory execution was performed.
Disable: Check this option if it is necessary to disable the asset.
Explanation: Enter the explanation for the asset inventory execution.
Click on the Save button to finish the explanation of the asset in the inventory. At this point, the execution percentage will be updated and the asset will go from the "To do" asset list to the "Done not found" asset list.
|
|
As soon as every asset has been inventoried, save the record and click on the Execute button to send the execution to the next step. Sending the execution to the next step can also be performed by clicking on the  button, which can be found in the toolbars of both the Inventory execution menu and the Verification programming task. By sending the execution to the next step, the inventory record may proceed to one of the following steps: button, which can be found in the toolbars of both the Inventory execution menu and the Verification programming task. By sending the execution to the next step, the inventory record may proceed to one of the following steps:
▪Inventory execution approval: The record will proceed to this task if the "Execution approval" task has been checked in the inventory activity General data during its creation/planning. ▪Finished: If the approval step has not been configured in the activity, then the inventory will be finished.
|


