Executing a repository event |
|
|
See how to create a storeroom repository event:
1.On the main screen toolbar, click on the
2.On the screen that will be displayed, locate and select the storeroom from which the repository will be moved and save the selection.
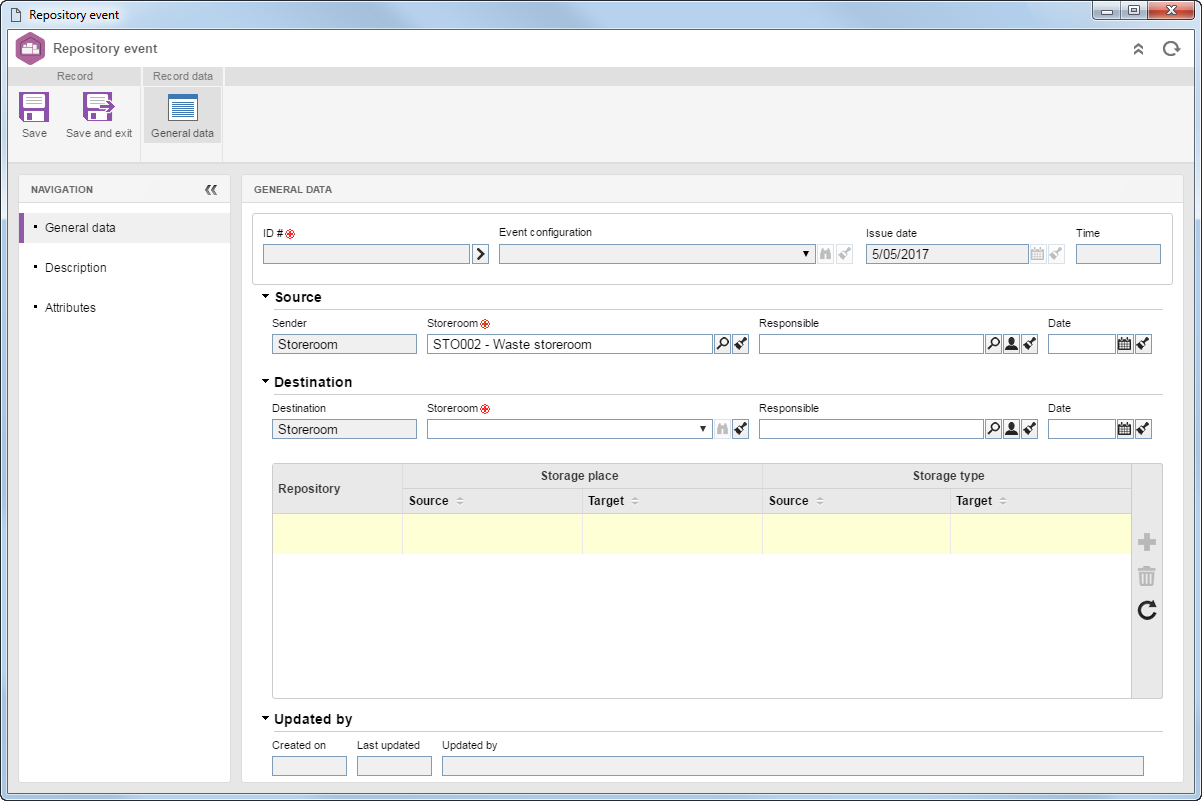
3.At this point, the repository event data screen will be displayed:
4.In the Record data
5.Save the record to enable the other fields and sections.
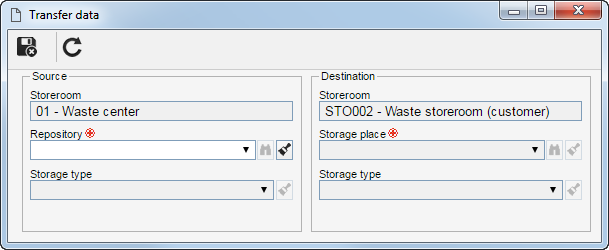
6.After saving the record, fill in the following fields on the transfer data screen that will be displayed:
Source: In the Repository field, select the repository of the storeroom that will be transferred. Use the other buttons next to the field to view the repository data and clear the filled in value. If there is a storage type defined for the selected repository, the Storage type field will be filled in by the system with the respective information. Destination: In the Storage place field, select the storage place of the structure belonging to the destination storeroom to which the repository will be transferred. Use the other buttons next to the field to view the storage place data and clear the filled in value. In the Storage type field, select the type of storage that will be used to store the storeroom objects in the selected location.
Save the record, after filling out the necessary fields. In the list of records at the bottom of the General data section, the selected repositories will be displayed. If you wish, click on the
7.Use the Description section to enter relevant information about the repository event being performed.
8.The Attribute section will only be presented in the Navigation panel, if in the Attribute tab of the event configuration data is associated with an attribute. In this case, enter the value of the attributes that complement the event that is being performed. Those attributes that are required must, necessarily, have their values filled in. The blocked attributes will be filled in by the system with the default value set when it is associated with the event configuration. Remember that the way to enter an attribute value varies according to the configurations set when creating its record.
9.In the Record data Attachment: Use this section to associate the attachments related to the event. Refer to the Add attachments section for further details on how to add and/or associate attachments. Document: Use this section to add or associate the documents related to the event. Refer to the Add documents section for further details on how to add and/or associate documents from SE Document.
10.After filling in all the necessary fields, click on the
11.At this point, the system will ask whether you wish to send the event to the next step. Choose the desired option: ▪OK: The repository will be moved to the storeroom set as its destination and the event will be finished. ▪Cancel: The repository event will continue pending with the Issue status. |