|
The target, measurement and additional field values can be input through several SE Performance menus:
▪Management  Scorecard planning (Structure vision and indicator data). Scorecard planning (Structure vision and indicator data). ▪Execution Scorecard execution (toolbar, Structure vision, Indicator vision and indicator details). ▪My tasks Execution: Target input, Measurement input, Target approval and Measurement approval (as long as all responsible parties have permission to add/edit). ▪My tasks Tracking: Measurement tracking, Target tracking, Target rejection and Measurement rejection. ▪Widgets: My indicators and Indicator list.
▪To add, edit and delete the target, measurement and additional field values successfully, the logged user must have the "Target" and "Measurement" controls allowed in the indicator security list, even if they have the "Responsible user" control allowed. ▪If the scorecard is under revision, it will not be possible to enter the target and measurement values in it. To do that, it must be released. ▪It is also possible to enter targets and measurements through the Execution  Target/Measurement menu; however, since the screen is presented differently, it will not be approached in this section. Refer to the respective menu for further information. Target/Measurement menu; however, since the screen is presented differently, it will not be approached in this section. Refer to the respective menu for further information. |
Target/measurement input without approval
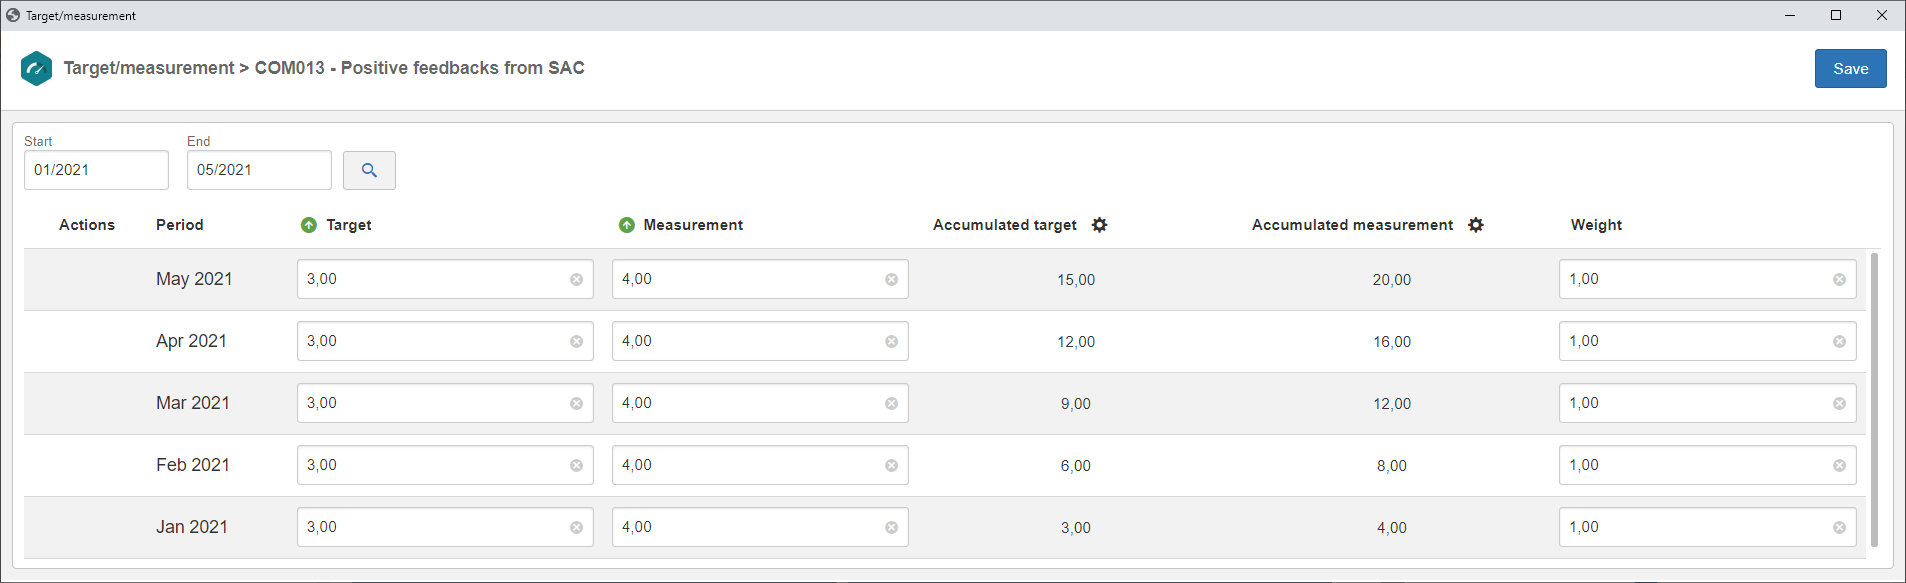
When there is no approval configured for the target/measurement, the screen to enter the values will be displayed according to the image below. In the upper part, it is possible to select the start and end dates (interval) of the period of the indicator whose values you wish to enter.
Target/measurement input with approval
When there is approval configured for the target/measurement, the screen to enter the values will be displayed according to the image below. In the upper part, it is possible to select the start and end dates (interval) of the period of the indicator whose values you wish to enter.
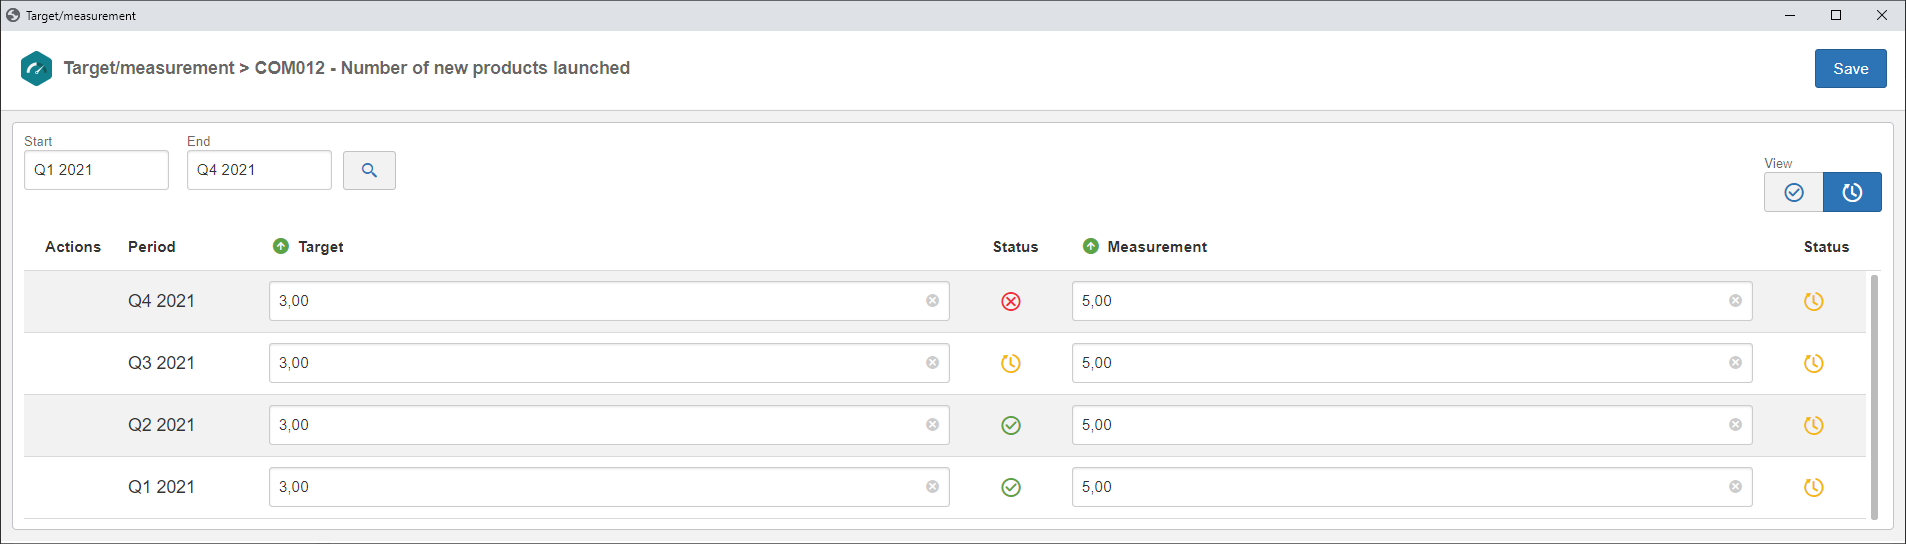
It is also possible to switch between the two viewing types:

|
By clicking on this option, the users with the "Target" and "Measurement" controls allowed in the security of the indicator may perform the inclusion of the periods and their target and measurement values. The members of the responsibility routes for the approval of the target and measurement will also be able to add and change the values of the period, according to the approval configuration, in addition to approving the entered periods.
|

|
By clicking on this option, the periods whose target and measurement values have been approved and their respective values will be displayed. On the screen that will be displayed, the members of the responsibility route for the approval of the target and measurement may also add and delete new periods for the indicator, according to the approval configuration. If for example, the target has approval and the measurement does not, after the target is approved, the measurement field and the additional field will be displayed in this tab for completion.
|
Target/measurement input without approval for indicator based on event
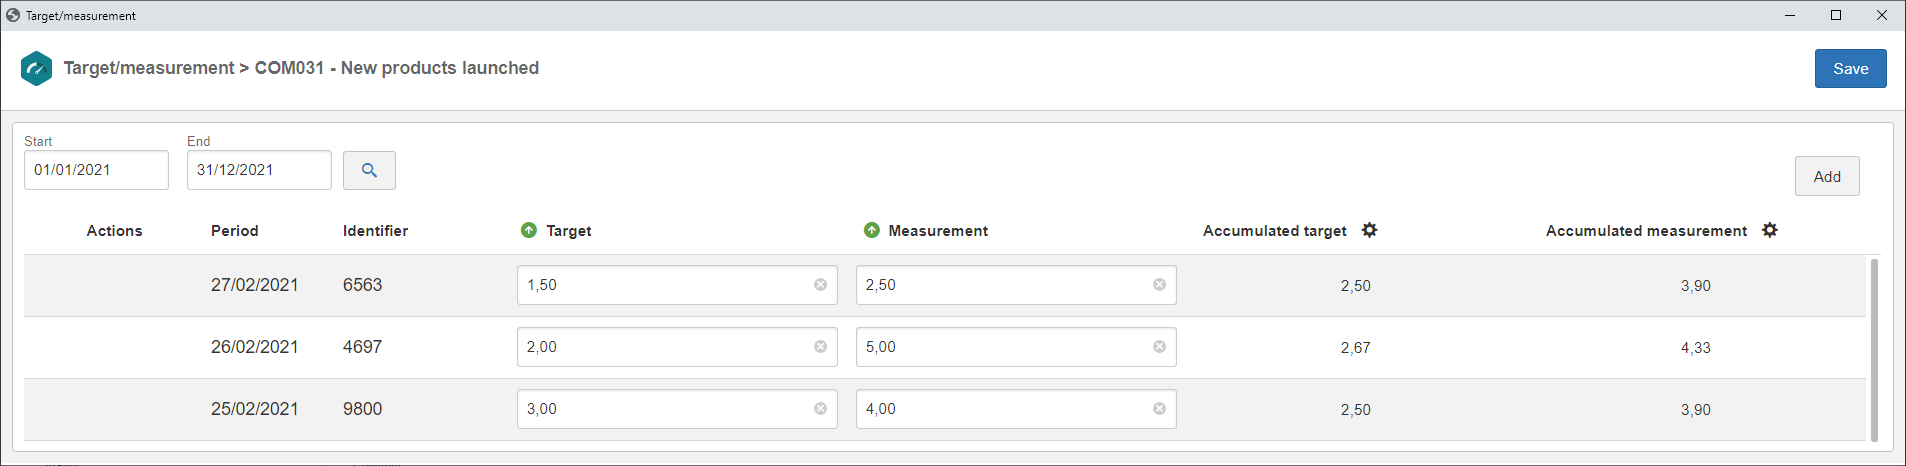
When the indicator is "based on event", the Add button will be displayed. On the screen displayed when clicking on it, fill out the Start and ID # fields and click on Save. When there is no approval configured for the target/measurement, the screen to enter the values will be displayed according to the image below. In the upper part, it is possible to select the start and end dates (interval) of the period of the indicator whose values you wish to enter.
Target/measurement input with approval for indicator based on event
When the indicator based on event has approval configured for the target/measurement, the screen to enter the values will be displayed according to the image below. In the upper part, it is possible to select the start and end dates (interval) of the period of the indicator whose values you wish to enter.
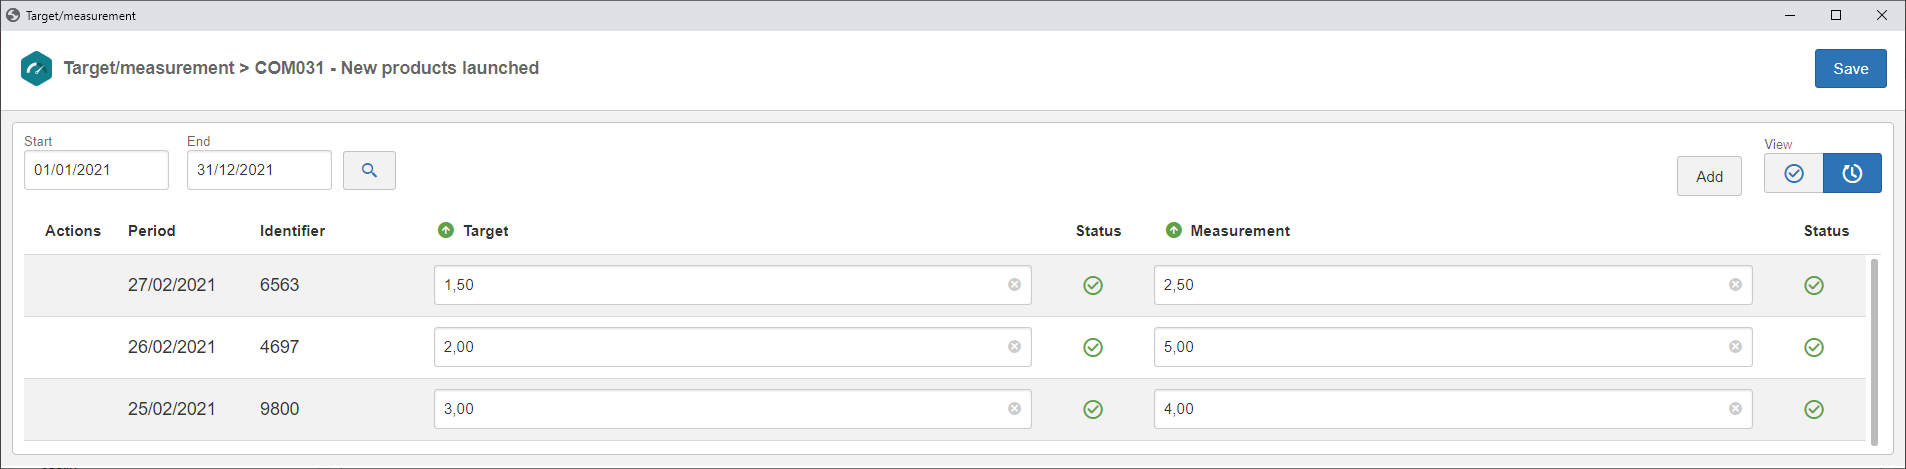
Note: The viewing options in this case are also Default and Approval.
Columns
At the bottom of the target/measurement input screen, the number of rows corresponding to the period selected in the Start and End fields will be displayed. The period information will be divided in the columns described below.
On the upper part of the columns, informative icons may be displayed, indicating if the logged user does not have permission to add values, if there is a formula for the field, or if the field is automatically filled out by the system.
Column
|
Actions
|
Hover the mouse over the field of this column to define if the period will be ignored, add attachments and comments, among other operations. See a detailed description of the actions that may be available in the Action buttons topic below.
|
Period
|
This column is filled out by the system with the period of the indicator whose values are being entered.
|
ID #
|
Displays the ID # added to the period data screen, in cases of target/measurement input for indicators based on event.
|
Target
|
This column will only be enabled for completion if the Yes option is selected in the "Does indicator have target?" field when creating the indicator. In this case, enter the target value for the indicator in the period in question.
|
Measurement
|
Enter the measurement value for the indicator in the period in question. This field may be disabled if, in the scorecard configurations, it is set that future measurements will not be allowed (in this case it will only be possible to add measurements until the current month) and/or that no measurements will be allowed without target (in this case it is necessary to enter the target first, and only after the measurement column will be enabled).
|
Status
|
This column will be displayed if it has been configured that the indicator target and measurement values will go through approval. In this case, the following icons may be displayed:

|
Indicates that the value is pending for approval. If the logged user is part of the approval route, after clicking on this icon, the screen will be opened for this operation to be performed. See the detailed description of how to perform this operation in the Target approval and Measurement approval sections.
|

|
Indicates that the value was rejected. In this case, the adjustment must be performed in that field and saved, in order to send it for approval again.
|

|
Indicates that the value was approved.
|
|
Accumulated target
|
If the None option is selected at the time of creating the indicator, this column will not be displayed. Otherwise, the field in this column will be filled out by the system according to the operation defined for the accumulation when creating the indicator. If the Manual option has been defined, enter the accumulated target value for the indicator in the period in question.
|
Cumulative measurement
|
If the None option is selected at the time of creating the indicator, this column will not be displayed. Otherwise, the field in this column will be filled out by the system according to the operation defined for the accumulation when creating the indicator. If the Manual option has been defined, enter the cumulative measurement value for the indicator in the period in question.
|
Weight
|
This field is filled in by the system with the weight assigned to the indicator at the time of its association with the scorecard. If in the indicator is set that the weight will be "Fixed", this field cannot be edited. Otherwise, it will be possible to edit the weight of the indicator in the period in question.
|
Additional field
|
This column will only be displayed if the indicator has an additional field associated. In this case, the column name will be the additional field name, and the number of columns displayed will correspond to the number of additional fields. Enter the value of the additional field in the period of the indicator in question.
|
Action buttons:

|
Click on this button if, for any reason, there are no values in the selected period. In this case, the period will not be considered in the calculation of the scorecard.
|

|
Click on this button to add an attachment related to the period. For further details on how to add attachments to the record, see the Adding attachments section.
|

|
Click on this button to add a comment related to the period.
|

|
Click on this button to edit the period data.
|

|
Click on this button to delete the period.
|
The fields of the columns may not be available if a formula has been configured for its completion.
|
|
|