Creating a new asset |
|
|
See, in this section, how to create a new asset in the system:
On the main screen toolbar, click on the arrow next to the
On the screen that will be opened, select the type that will classify the asset and save the selection.
At this point, the asset data screen will be opened:
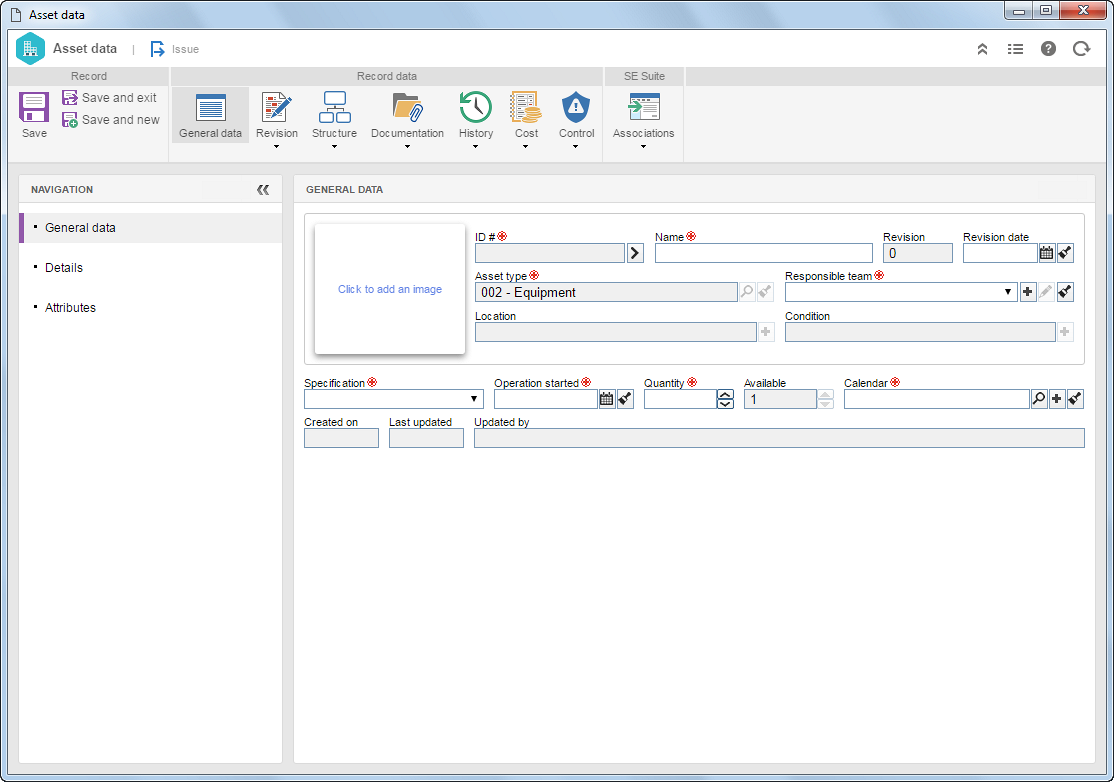
General data Click to add an image: Allows adding an image to represent the asset. The file must be in .jpg, .jpeg, .png, .bmp or .gif format. ID #: Enter an ID # for the asset. Click on the button next to it to generate an automatic ID #. Keep in mind that, if the use of a mask has been configured in the asset type in question, when generating an automatic identifier, the respective mask will be shown. This field may be disabled if the respective configuration is set, also, through the asset type. Name: Enter a name for the asset. Revision date: Date of the asset revision in question. This field will only be enabled if the asset revision is controlled by the system. If this field is filled in, then the asset revision will be saved as "released". However, if this field is not filled in and the record is saved, the system will ask about the revision start and will save the asset status as "issue". Responsible team: Select the team responsible for the asset. The team, in addition to editing the asset data, may add downtime records, reserve the asset, as well as revise it when the revision control is enabled in the asset type in question. Specification: Set a specification for the asset: gage, equipment, tooling, tool, computer or others. Operation started: Enter the start date of the asset operation. Quantity: Enter the existing quantity of the asset in question. In the case of gages, this field will automatically be filled in by the system with the number 1 (one). Available: Enter, from the existing quantity, the available quantity of the asset in question for operation. Calendar: Select the calendar that will be used by the asset in question. Click on the
Save the record after filling out the necessary general data. At this point, the following may occur:
Asset with revision controlled by the system: ▪If the Revision date field is NOT filled out, the system asks whether the user wishes to start a new revision. Click on the desired option: oOK: At this point, the asset data screen will be reloaded and, through the Revision section, it will be possible to perform the configurations related to this operation. See a detailed description of the fields in this section in the Creating an asset revision topic. oCancel: The data screen will remain opened for completion and the asset will be saved in the "Issue" step. In this case, only the users of the team responsible for the released asset can edit its data. ▪If the Revision date field is filled out, the revision will be released without the asset going through the steps configured for it. In this case, only the users of the team responsible for the released asset can edit its data.
Asset without revision control: In this case, when saving the record, the other sections and fields will be available to be filled out. Refer to the corresponding sections to check the details on the completion of each available section: ▪Cost |